Recurring Payments
As part of the bookkeeping process, almost every accounting department will need to make recurring journal entries for accounts payable. These entries are usually due to the fact that the company has regular payments, which are repeated financial transactions with the same counterparties that are made at a certain frequency on a certain date, usually once a month.
Typically, these may include payments for the rental of premises or equipment, interest payments on loans, payments for utilities, and payments for consulting or other services under service contracts. Each month, the accounting department needs to create and post bills and monitor the timing of payments to avoid overdue payments.
Automated Recurring Bills
Automating the creation and entry of bills for such payments greatly simplifies the accounting department's work and frees up time that can be used for other tasks.
How Recurring Bills Work in Odoo
The Odoo system allows you to create a bill that will be repeated on a regular basis and to set it up in such a way that it will ensure the automatic creation of all the other bills. Thus, when you post a bill in the system, the next bill is automatically created for you to pay. New auto-generated bills are stored in the system in draft status until the document is posted in the system. The date on which a bill is created and the date on which it is posted in the system are determined by the settings. While the bill is in draft status, it can be changed or canceled, if necessary. After the document has been posted, the system makes the corresponding entries in the accounting journal.
How to Configure Recurring Bills in Odoo
To set up automatic creation of regular bills in the system, you need to make additional settings when creating a bill. After that, all subsequent bills for payments will be generated automatically.
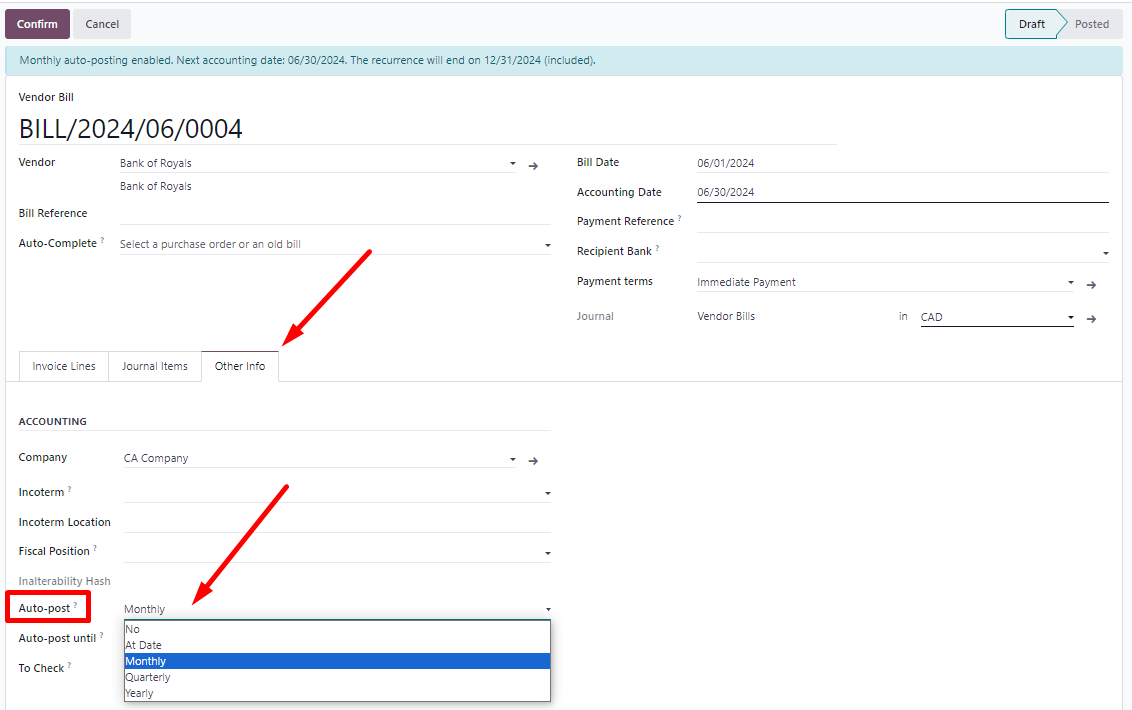
To do this, first create a bill and fill in all the important fields in the document header: Vendor, Bill Date, Accounting Date, Payment Terms, and fill in the specification data on the Invoice Lines tab. After that, on the Other Info tab, you will have to activate the Automatic Posting function and set the frequency of its execution. The period you specify will be counted each time from the date of the last bill:

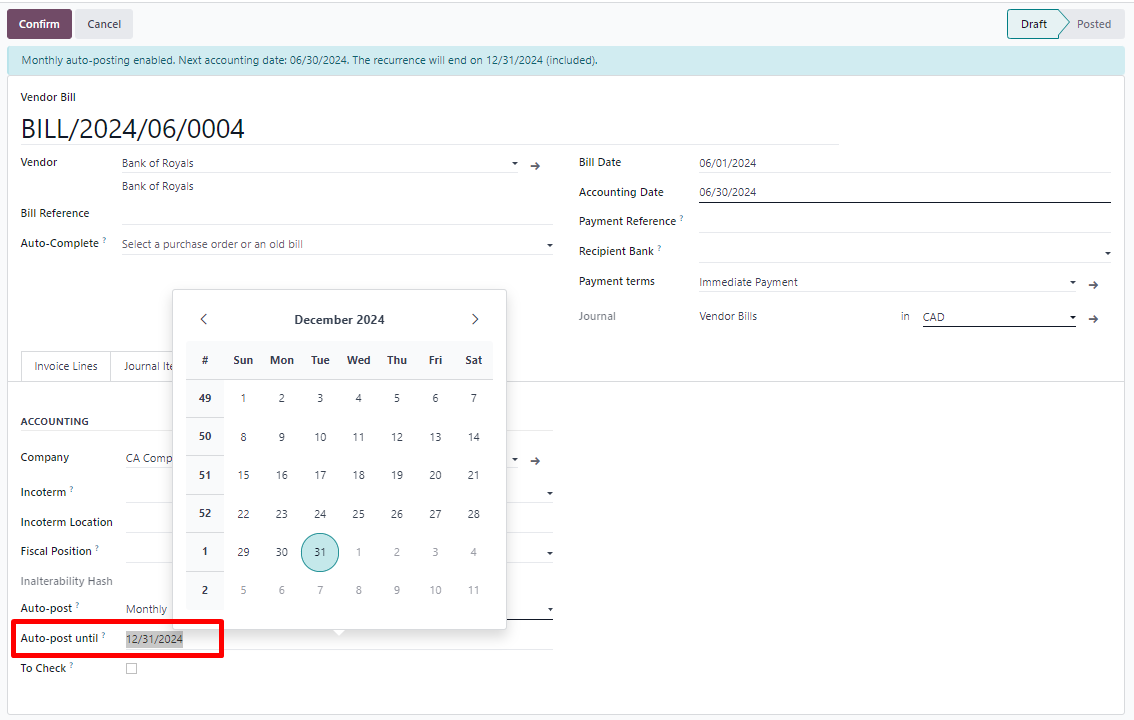
You
can also limit the period of billing by specifying the date up to which
you want to generate bills in the Auto-post until field:

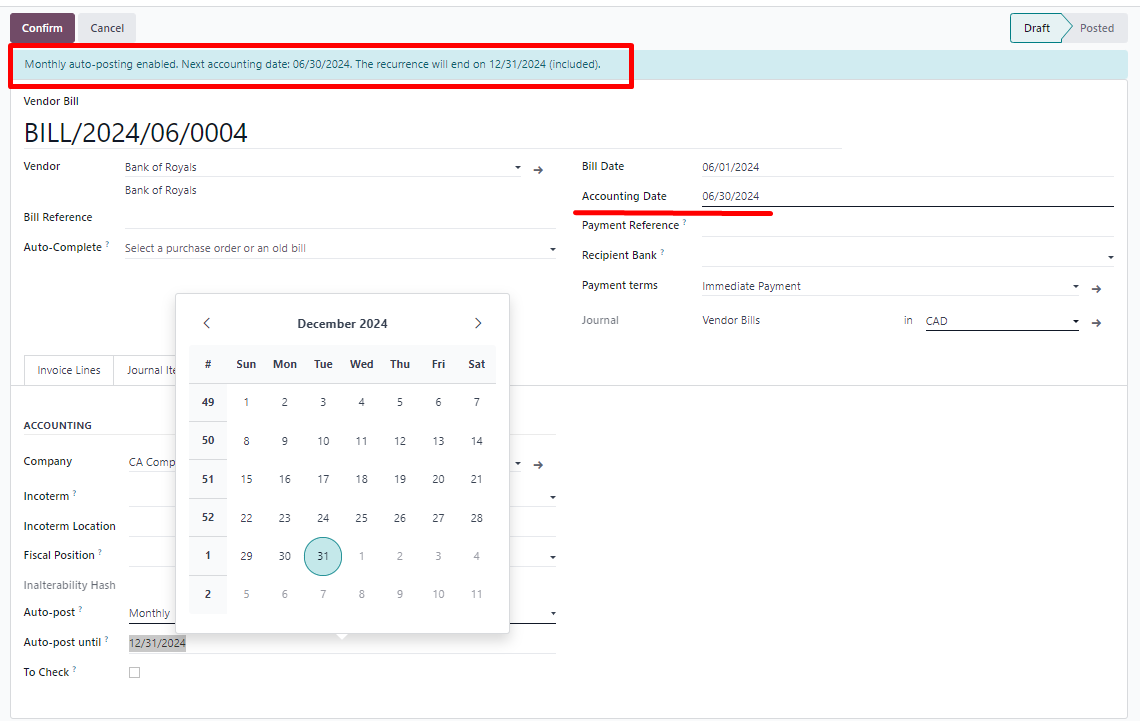
The date of the journal entry depends on the date you set in the Accounting Date field. If it is the last day of the month, the documents are posted and the journal entries are created on the last day of the month.
If you want the journal entries to be created on
the 1st of the month, then the Accounting Date should also be the first of the
month.

When the current bill is posted, the system will automatically generate and place the next one. And this will be repeated until the end of the specified period if you have set this restriction

When
you open this new bill, you can see its details:

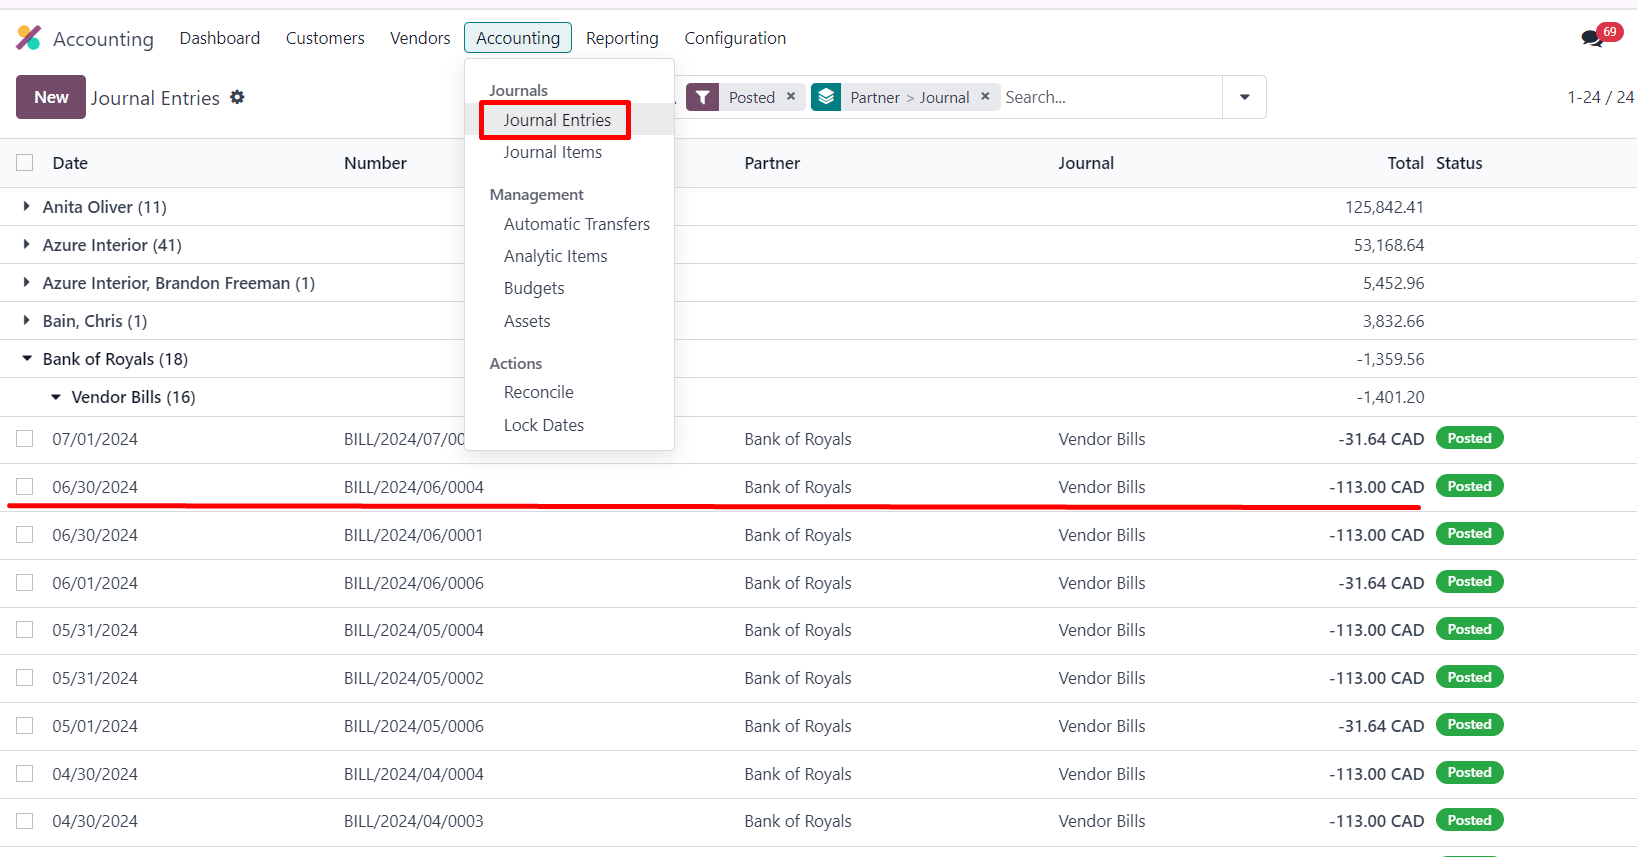
If you go to the accounting journal entries, you will see that they look like the following:

Thus, in Odoo you can customize all the recurring bills you deal with in your accounting. This will save you from manual control and document entry and will give you a lot of time for other equally important things.