Accounting is an important part of managing any business, and one of the key aspects of this process is the allocation of additional costs to the cost of production.
Landed Costs
When you purchase or manufacture goods, you cannot assume that their purchase price is their cost. You often need to adjust the value of the inventory in your warehouse to account for additional costs incurred during the procurement or production process. For example, if you purchase transportation services or have other additional costs that affect the cost of production, you must allocate those additional costs to the purchased products. In accounting, these additional costs are called landed costs and have their own specific application.
In general, landed costs can include transportation, process improvements, rent, depreciation, energy, and other costs related to procurement or production.
Note that you can allocate landed costs to goods that you purchase or produce. However, you cannot allocate landed costs to goods that you have already sold or are about to ship to a customer.
The Odoo system has functionality that allows you to allocate landed costs to products. In addition, it is quite flexible in terms of distribution settings, as it allows you to distribute landed costs in different ways: equally between the names of the products, or depending on their quantity, price, weight, or volume.
Now let's take a look at how landed cost distribution works in practice in the Odoo system. For example, let's take a look at how to allocate additional costs for delivery services when purchasing goods.
Setup
of Landed Costs in the Odoo System
Activating the Function
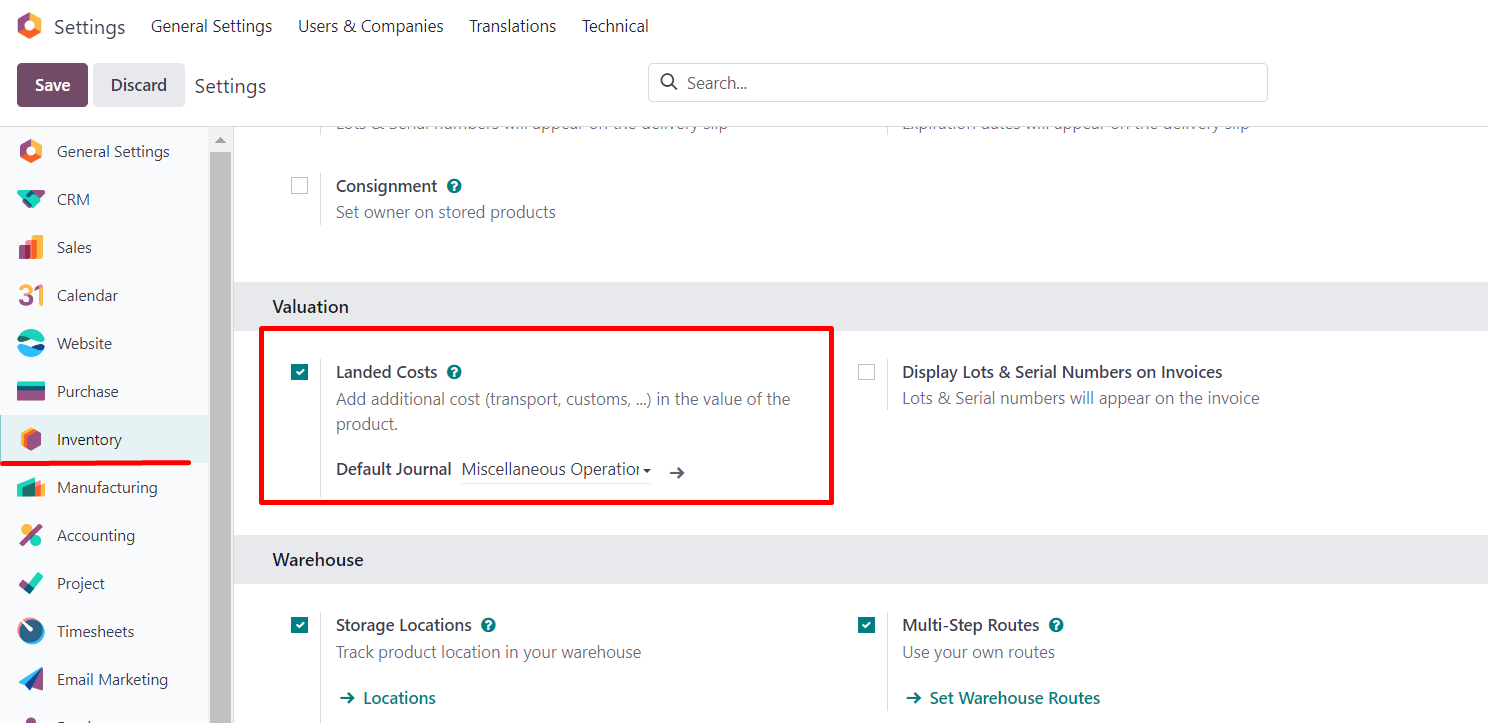
In order to be able to use the tool for allocation of additional costs in the system, it is necessary to activate this function, which can be done in the Inventory module settings by checking the appropriate box and specifying the journal in which the corresponding entries should be made when adjusting the inventory valuation:
Creation of a Document for the Distribution of Landed Costs
After that, the corresponding section will appear in the drop-down menu of the Inventory module: Operations/Landed Costs:
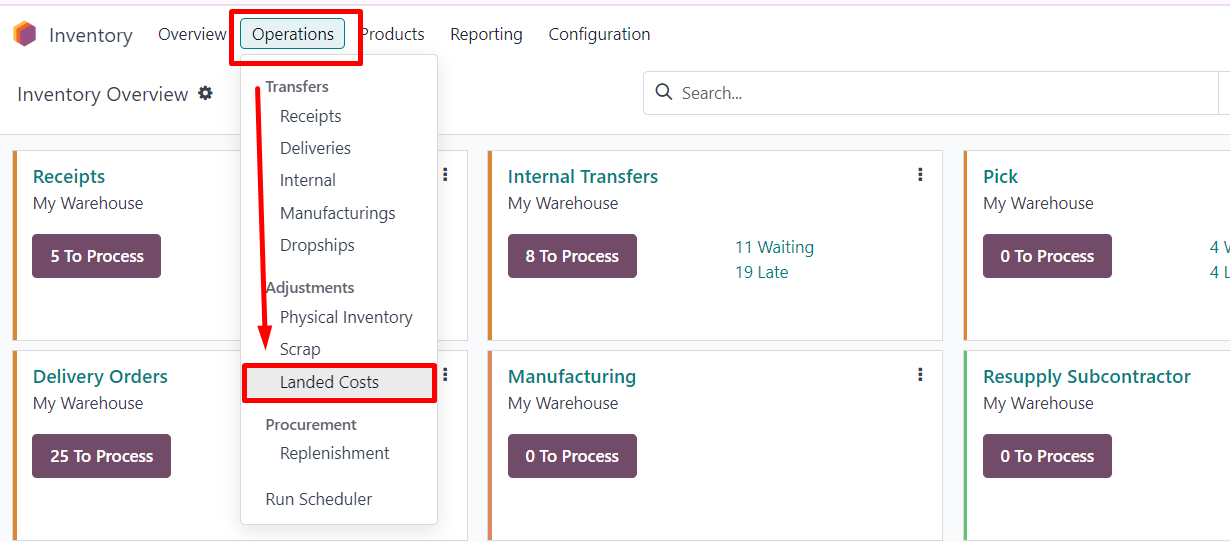
From this menu you can create a new document to allocate landed costs.
This tool can be used to adjust up or down the cost of inventory in the warehouse and can be applied both to warehouse movements that we create when we buy and sell goods and to production orders, i.e. finished goods. If we want to allocate landed costs for the production of products for a certain period of time, the system will reevaluate both what is physically in the warehouse and the movements that were made for this batch of goods. Note that the mechanism for allocating additional costs works with inventories that use the FIFO or Average cost (AVCO) inventory valuation method, as well as with automated inventory valuation.
If the system has an invoice from a vendor that
contains a product that is an landed cost, you can specify this invoice in the
corresponding Vendor Bill field, and then the landed cost can be created
directly from this bill. The landed cost form looks like this:

Customization of the Product, Which is a Landed Cost
Next, we need to select the products whose costs
we want to add to the cost of inventory. In order for a product to be allocated
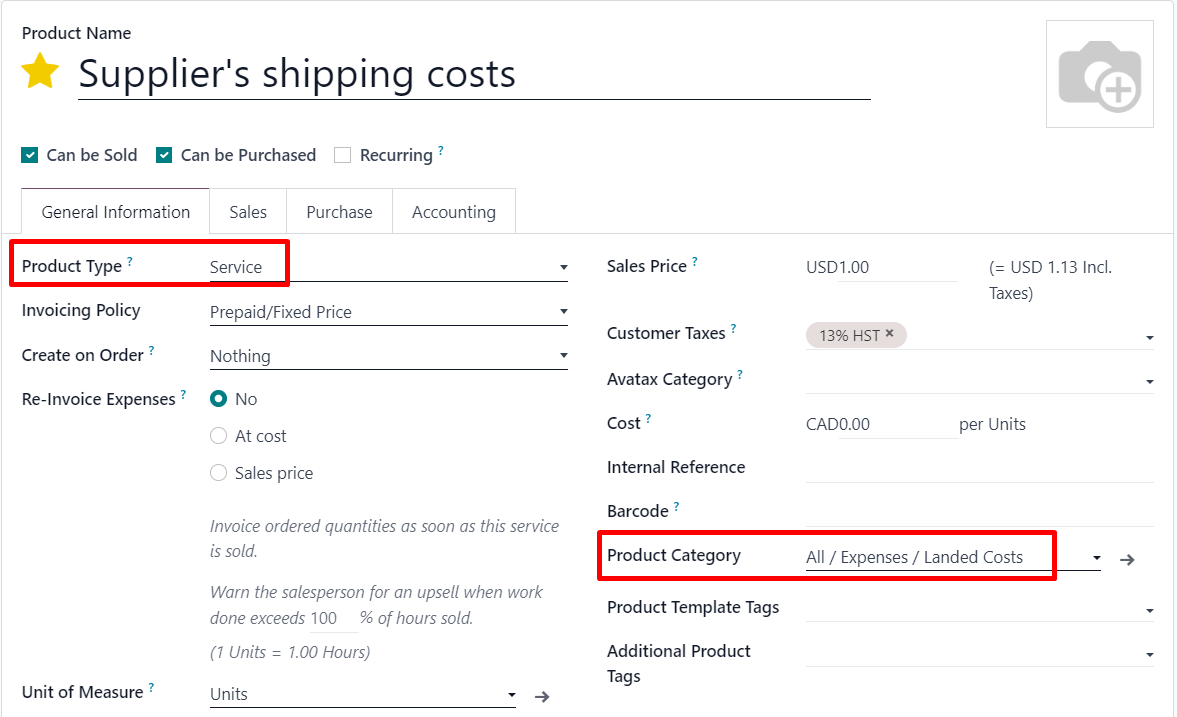
as an landed cost, certain settings must be made in it. Namely, in the card of
the product that is an landed cost, the product type must be specified as
Service, and the product category must be selected, which is also preconfigured
for products that are landed costs:
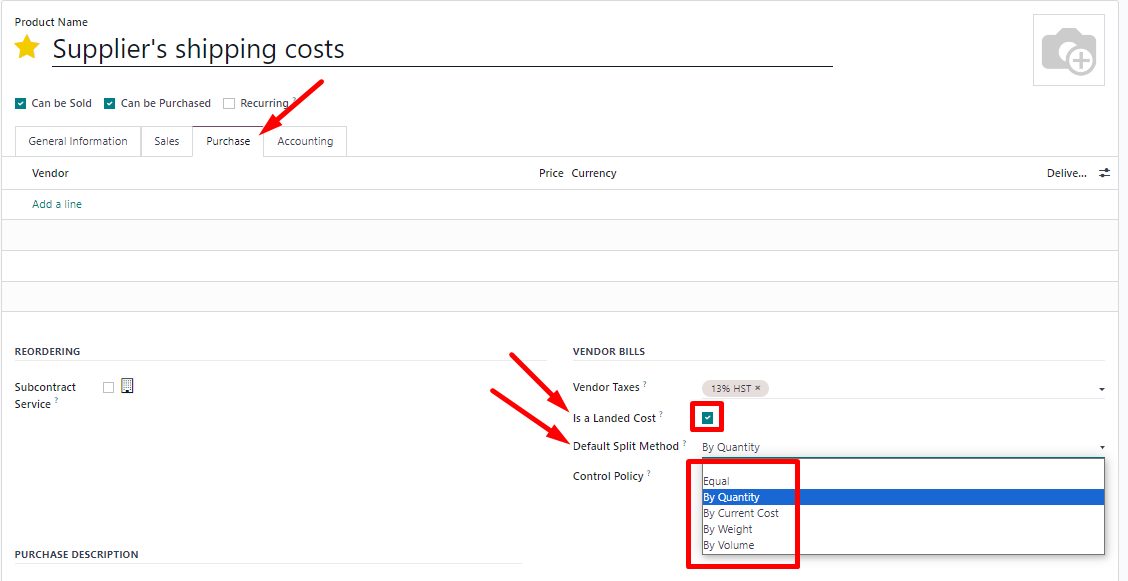
And
also on the Purchase tab, you will have to check the box that this product is a
landed cost, that is, that we are going to purchase it, and later the amount of
the cost for this product will be allocated to the cost of the inventory in the
warehouse. And here you can immediately specify which split method should be
used by default for this product:
Allocation of Landed Costs
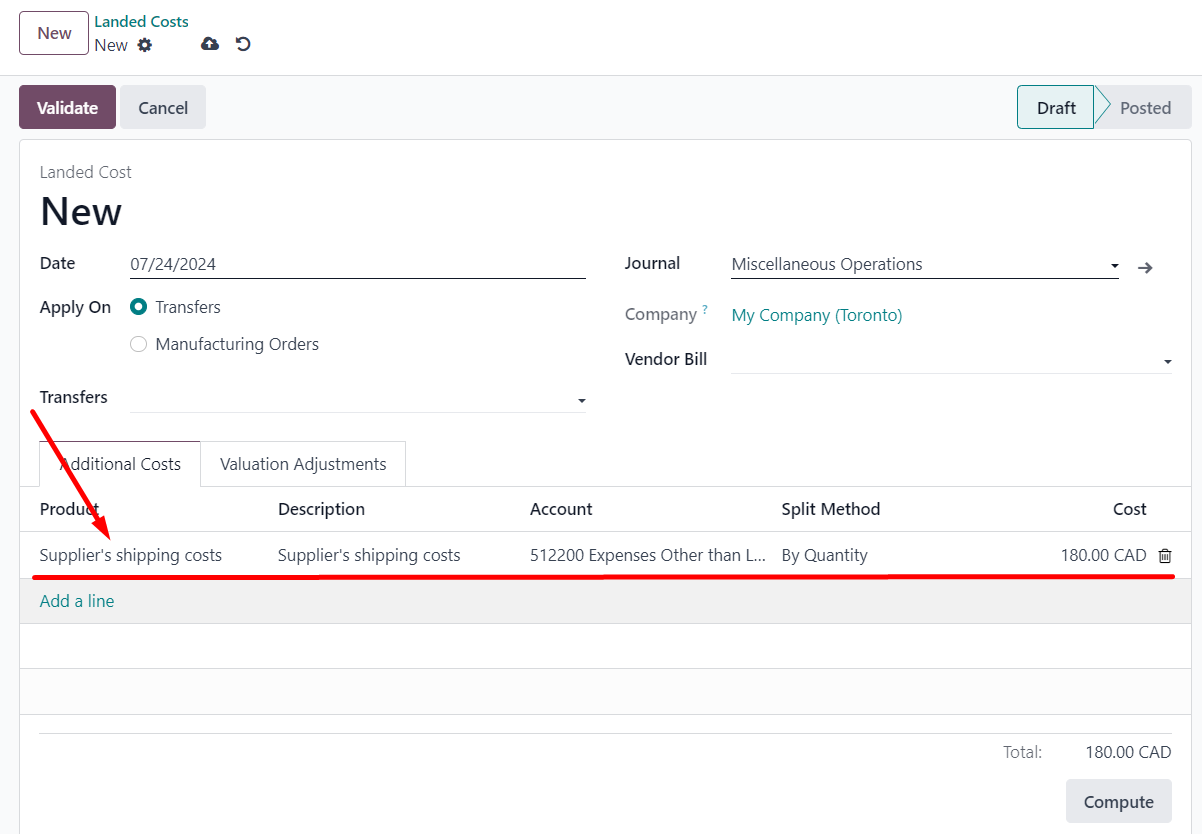
Let's go back to our extra costs. When creating
a new document, in the lower part of the table, select the product that is a
landed cost, indicate its cost that we want to allocate, and adjust the plit
method if necessary. Why we say "if
necessary": by default, the document will show the split method that is
set in the product card settings, but if you need to use a different split
method for a particular case, you can change it.
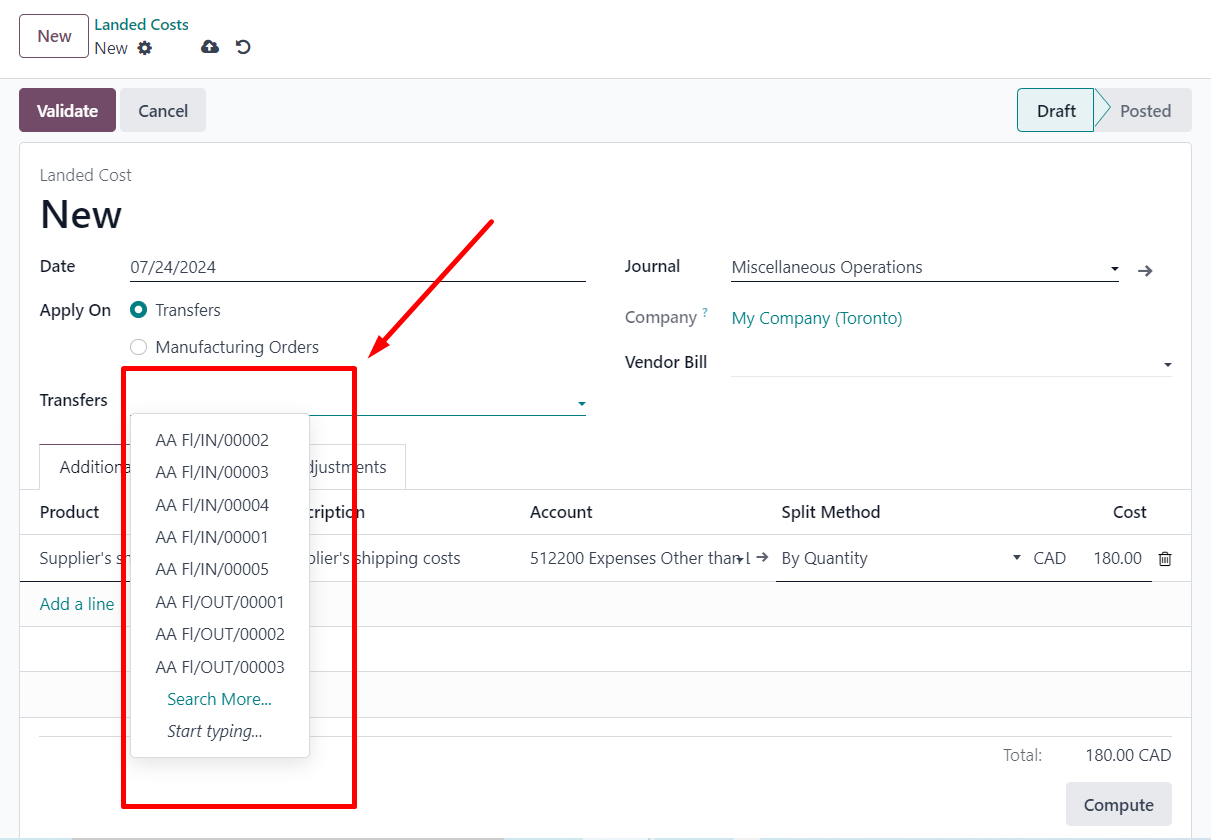
Once we have entered all the costs we want to allocate, we need to select the move we want to revalue. You can select multiple moves at once and they will all be revalued:
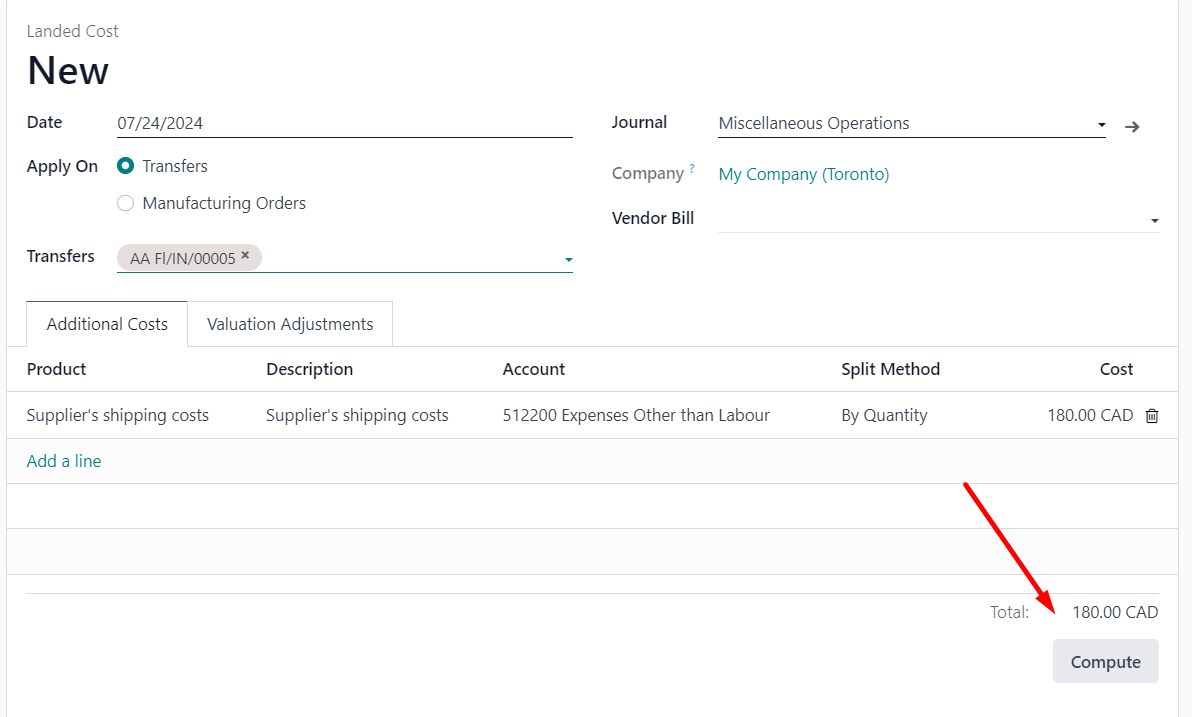
When
all the fields for this landed cost distribution are filled in, click the
"Calculate" button:
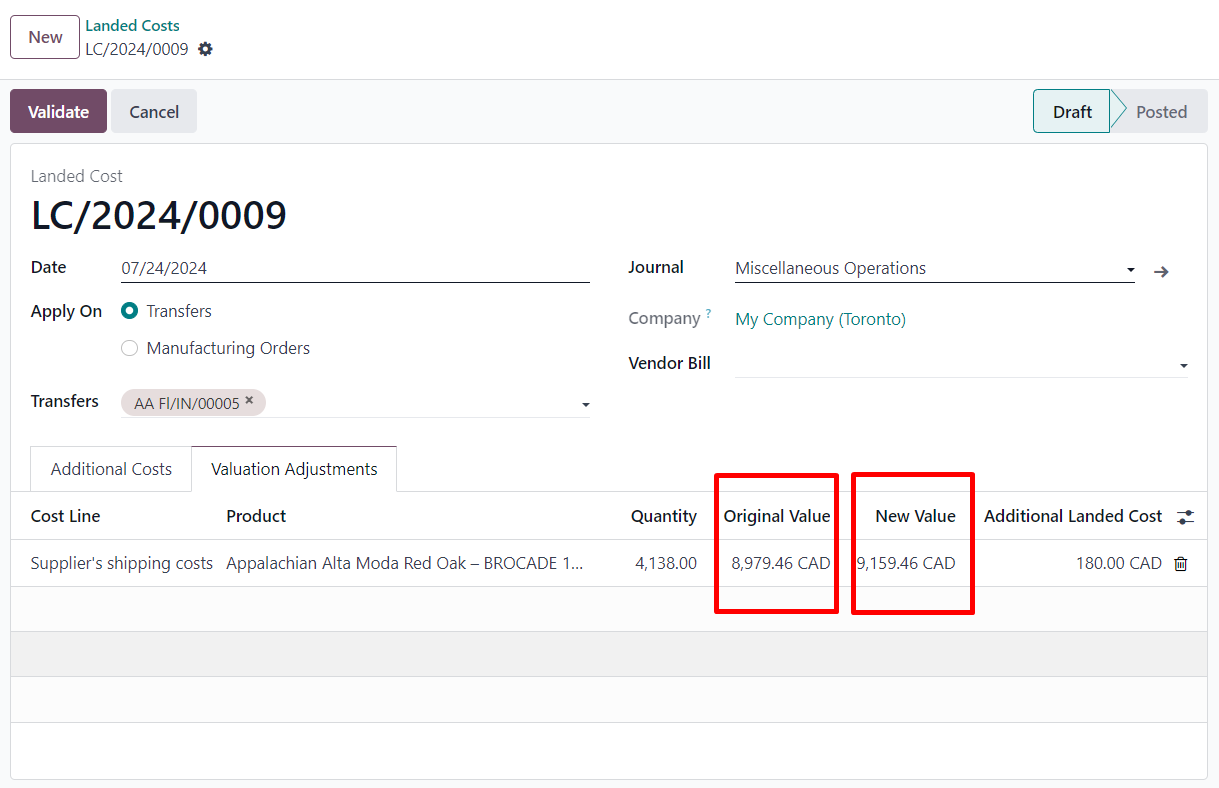
On the second tab, Valuation Adjustment, we see the result of the recalculation of the cost of all the goods that were in the selected movements. Here we can immediately see what the cost price was before the allocation of landed costs, and what the cost price became after we allocated additional costs for the services of the carrier for this movement:
To revalue the inventory down, the amount of additional costs should be indicated with a minus sign on the first tab Additional Costs, and then the amount of additional costs is subtracted from the cost of the inventory, thus reducing its total cost. In other words, you can use this tool to revaluate the inventory cost up or down.
Once the revaluation has been carried out, click
on the Validate button and we will see the corresponding entries in the
Accounting Journal, where the results of the revaluation will be displayed:
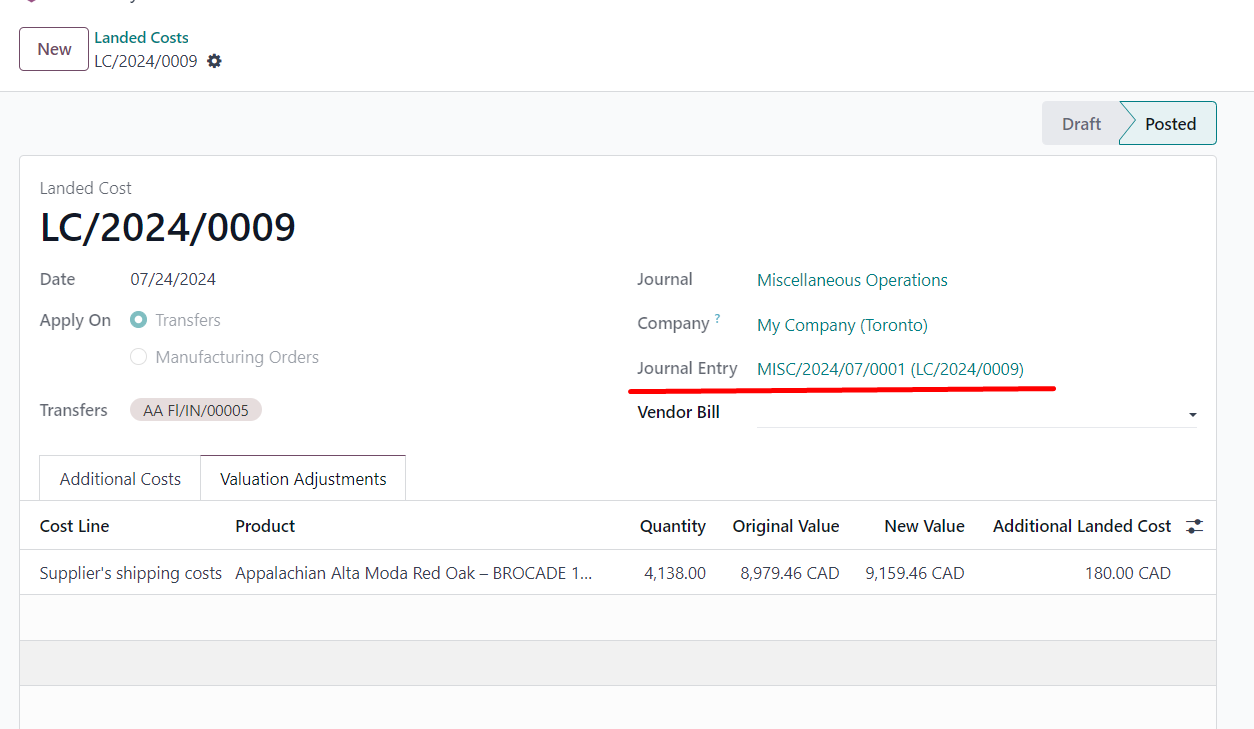
Then you can go to the product card and see if the cost of the product has changed.
Correcting Erroneous Entries
If it turns out that you made a mistake somewhere and the journal entry was made by mistake and you need to cancel it, this function is not available in the basic functionality. That is, you will not be able to cancel the revaluation journal entry. The way out of this situation can be as follows: if you want to cancel the entry, create a copy of it, but enter the amount of the additional costs with the opposite sign, and revalue it. This way you will have a new record that will correct the previous one to the original value of the inventory cost. Or you can look for additional modules that allow you to reverse such operations. Of course, it is better not to make mistakes in order to avoid creating unnecessary journal entries and doing unnecessary work, so users should be as careful as possible when working with the allocation of landed costs.
Creation of Landed Costs From the Vendor Bill
In addition to creating landed costs from the
Inventory module menu, this function is also available directly from a vendor bill.
If you have a vendor bill that contains landed costs, you can allocate them
directly from that bill by clicking the Create Landed Cost button
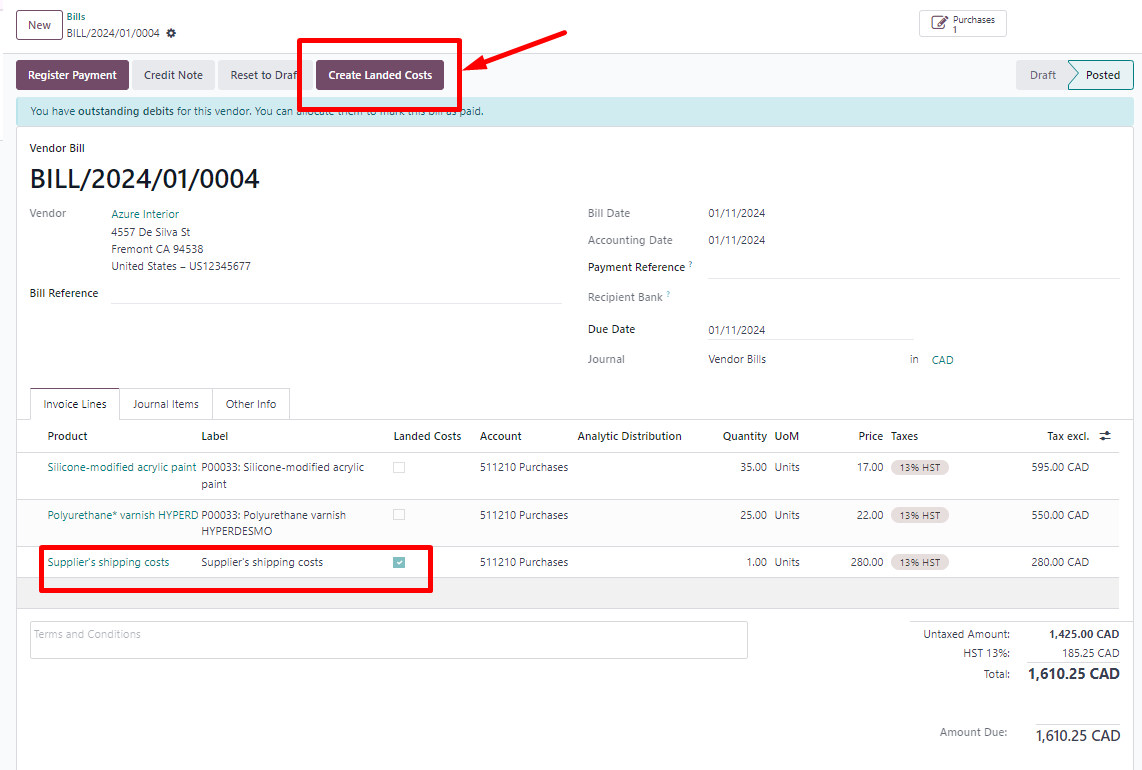
After
the recalculation, you can view the landed costs associated with this move
directly from this white by clicking on the corresponding smart button:
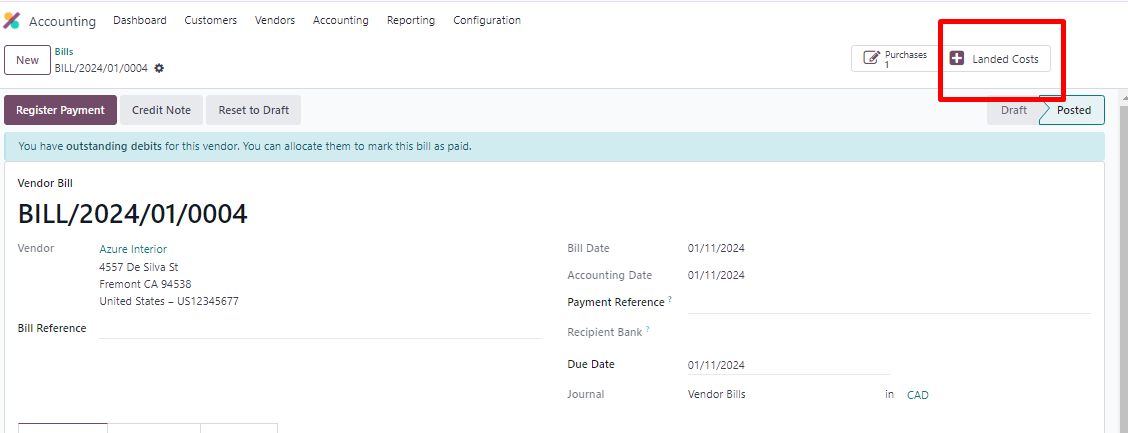
By clicking on this button, we will be taken to the already
familiar form of the document of landed costs with the recalculation for the
inventory that has been purchased within this white:
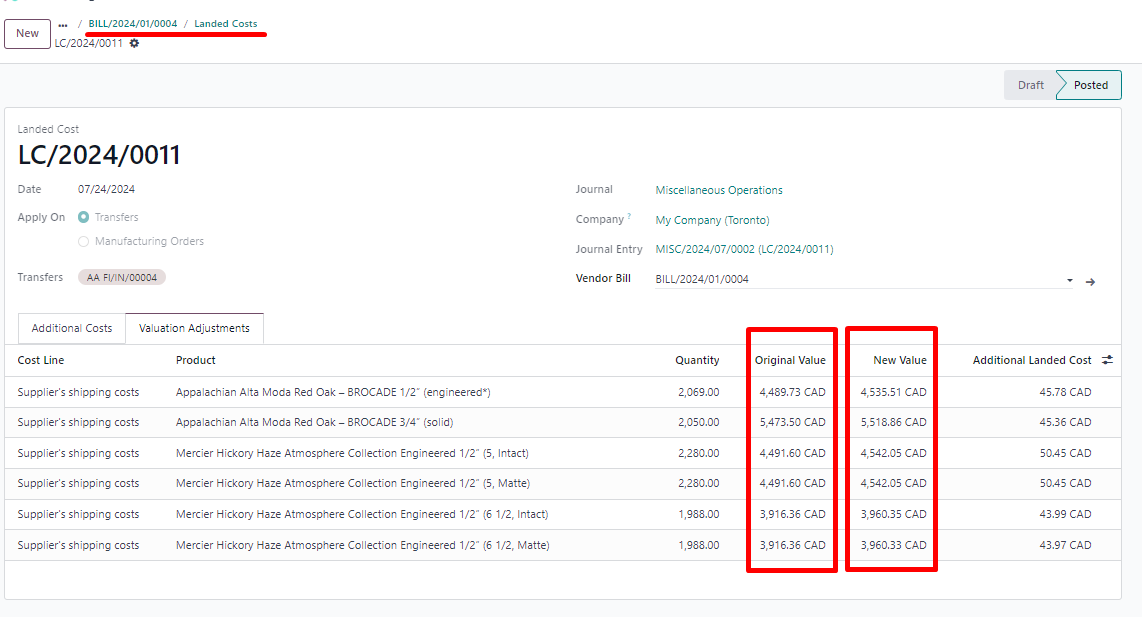
Summary
As you can see, the basic version of Odoo includes a powerful tool that is simply indispensable for the work of an accountant for the revaluation of inventory through the distribution of landed costs. In order to use this functionality, there is no need for the installation of additional modules and there is no need for the involvement of a programmer. It is enough to make simple settings, which we have discussed in this article, and any user of the system can do it.